Short description
With Virtual Assistants (VAs) you split work in ArbitrageOne — e.g. sourcing, purchase processing or returns handling — without sharing your credentials. Every VA gets their own account with individually assigned permissions, an optional salary model incl. bonus and is tracked separately in all modules.Requirements
- Your plan must allow VA management.
- The maximum number of VAs depends on your tariff — when reached, a lock icon appears instead of the add button.
Step-by-step guide
Step 1: Open the VA overview
→ Open directly in the app: app.arbitrageone.de/virtualassistants Go to Settings → Virtual Assistants. You’ll see a card overview of all existing VAs with name, email, last login and login counter.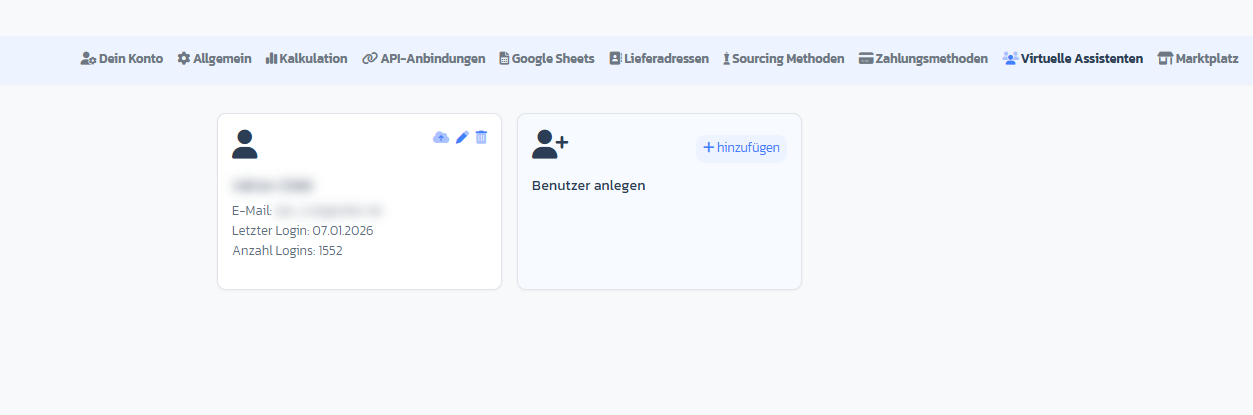
Step 2: Create a new VA
Click the + symbol in the Create user card. You land in the creation form. Required fields:- First name and last name
- Email address — the onboarding link goes here later
- Language — DE or EN (also determines the language of the onboarding email)
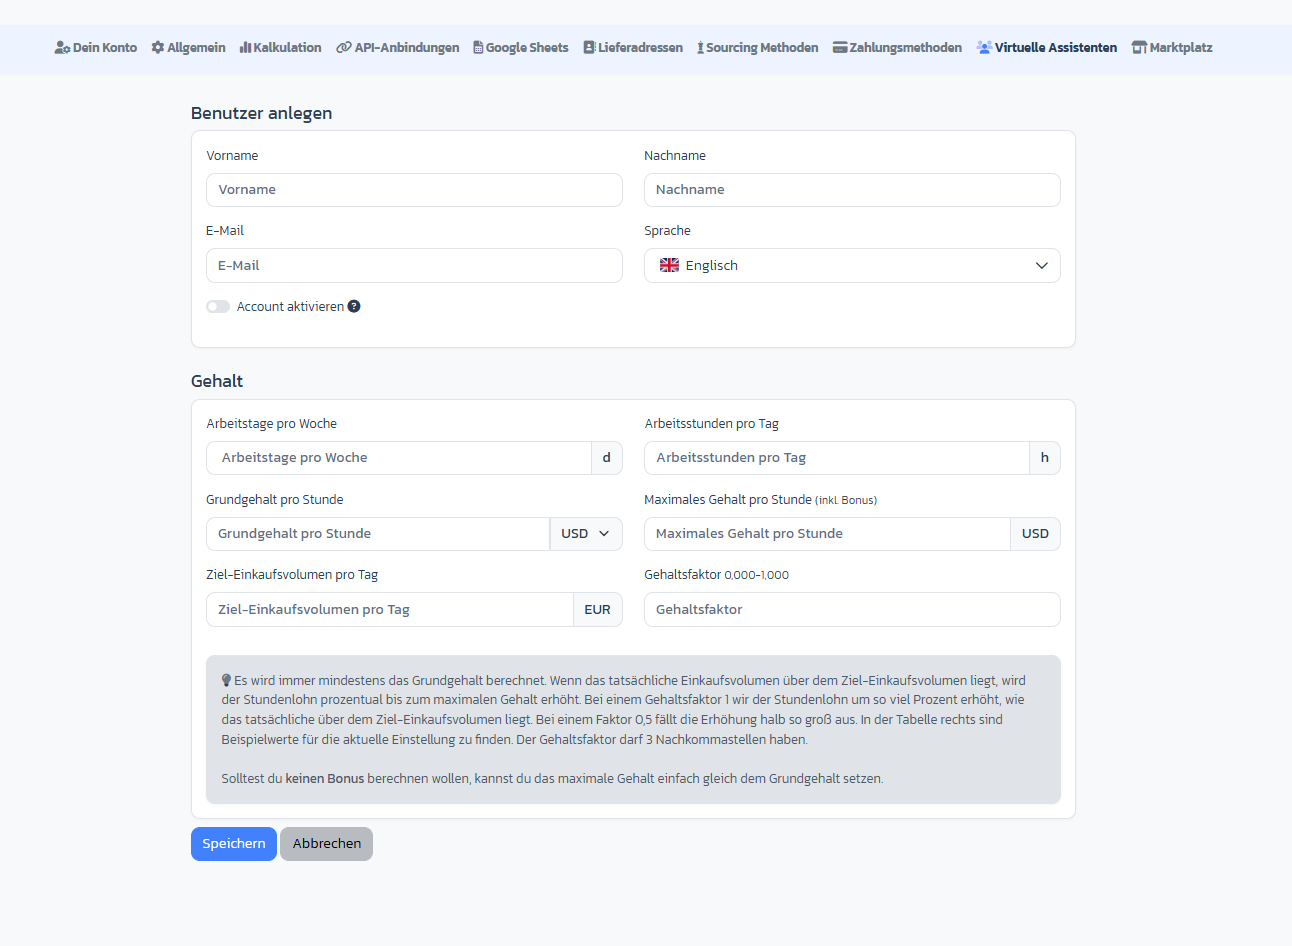
Step 3: Configure salary & bonus (optional)
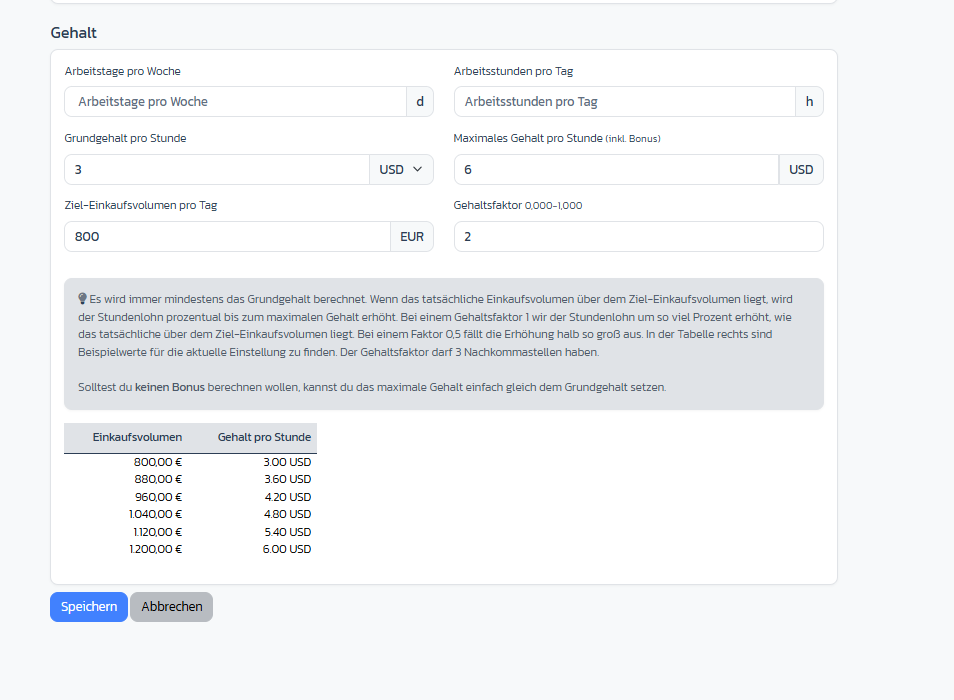
In the Salary section you can store the salary model of your VA directly:- Working days per week / working hours per day
- Base salary per hour with currency (USD, EUR, PHP, GBP)
- Max salary per hour (incl. bonus)
- Target purchase volume per day — threshold at which the bonus kicks in
- Salary factor (0.000 – 1.000) — how strongly more volume increases the salary
Step 4: Activate account and save
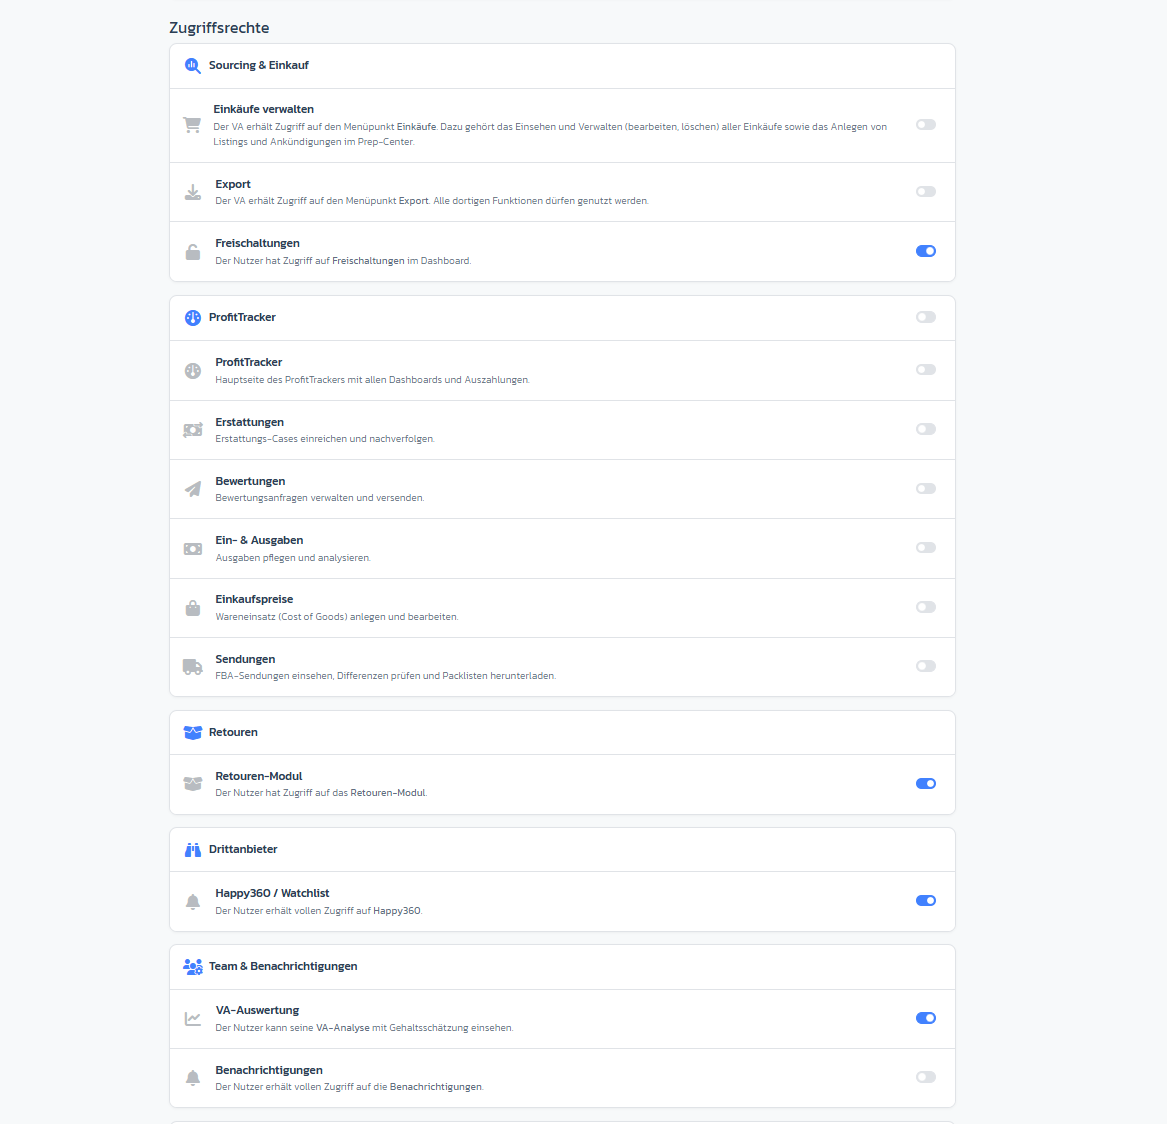
Set the toggle Activate account if the VA should be able to log in directly. Click Save — you land in the edit view, which now also shows the permissions section.Step 5: Assign global permissions
In the Access rights block you see toggles for entire modules:- Manage purchases — access to Purchases
- Manage export — run exports
- Watchlist access — FlipHunter / Watchlist (only if licensed)
- See Ungatings — check restrictions status
- Returns access — handle Amazon returns (only if module is active)
- VA analysis — own performance report for the VA
- Notifications — receive Discord / email alerts
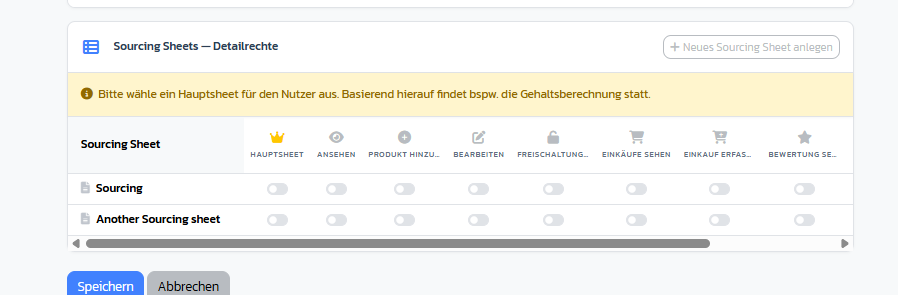
Step 6: Set sheet permissions
The sheet permissions table controls what the VA may do per Sourcing Sheet. Per sheet you can enable individually:- View — see the sheet
- Add Product — add new products
- Edit — edit existing rows
- See Ungatings — see restrictions per row
- View Purchases / Track Purchase — see / record purchases
- View Rating / Edit Rating — see / assign ratings
- View Analysis — analytics of the sheet
Step 7: Send onboarding email
Back in the VA overview you click the cloud upload icon on the VA card. A modal opens with a pre-prepared onboarding email (German or English depending on the language setting).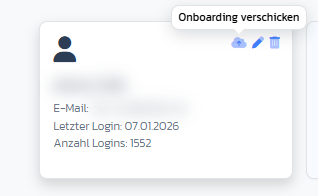
- The VA account is automatically activated.
- The VA receives an email with a password setup link (valid for 24 hours).
- Your email address is stored as the reply-to address.
Monitor activity
On the VA card you see at any time:- Last login — when the VA was last active
- Login counter — how often the VA has logged in in total
Edit or delete a VA
- Edit: click the pencil icon on the VA card → you land in the edit view with all fields.
- Delete: click the trash icon → after confirmation, the VA account is deactivated. Their existing entries (purchases, ratings) are kept.
Important notes
- Main sheet is an exclusive concept — you can choose only one per VA. If the VA should work as primary owner on multiple sheets, simply create them with full rights without marking a main sheet.
- If a sheet is already assigned to another VA as their main sheet, you’ll see a lock icon instead of the checkbox — only the account owner can change the assignment.
- The onboarding link expires after 24 hours. If the VA doesn’t make it in time, they can request a new link via “Forgot password”.
- The bonus model only affects the display in the VA analysis — it doesn’t trigger automatic payments.