Short description
In the Shipments section you see every FBA inbound shipment with the comparison sent vs. received. Discrepancies show you immediately where Amazon checked in fewer units than you sent — the typical Lost Shipments for which you can request a reimbursement.Page layout
KPI cards at the top
- Total shipments
- Shipments with discrepancies + count of missing units
- Open cases
Filters
- Status selection (multi): WORKING, READY_TO_SHIP, SHIPPED, IN_TRANSIT, RECEIVING, DELIVERED, CHECKED_IN, CLOSED
- Only with discrepancies — shows only shipments with missing units
- Packing List Settings — settings for generating the packing list.
Table
| Column | Content |
|---|---|
| Shipment ID | Amazon ID |
| Created / Updated | timestamps |
| Name | your shipment name |
| Status | coloured badge |
| FC | Fulfillment Center, e.g. HAJ1, DTM1, XPO1 |
| SKUs | number of distinct SKUs |
| Sent / Received | unit counts |
| Discrepancy | highlighted red when > 0 |
| Case | case number (inline editable) |

Step-by-step: File a lost-shipment case
Step 1: Apply the discrepancy filter
→ Open directly in the app: app.arbitrageone.de/amzshipments Click Only with discrepancies — the list shows only shipments with missing units.Step 2: Open the case creation modal
Click the row (or the action icon) — the Create case modal opens with:- pre-written message (copyable, language switchable)
- list of affected items with SKU, FNSKU, sent/received/discrepancy
- buttons Open case (to Amazon), Copy (text to clipboard), Packing list (PDF)
- field Case number to save
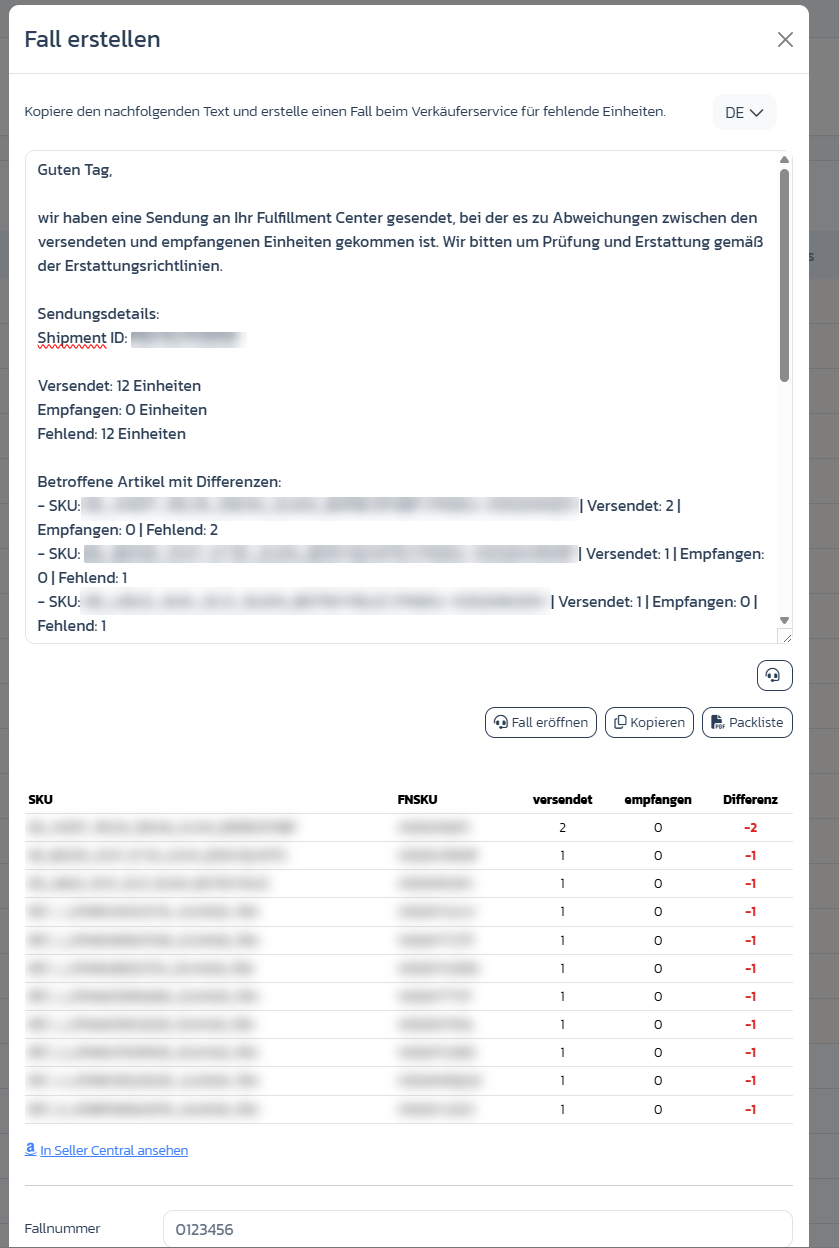
Step 3: Generate the packing list
In the modal you create a PDF via Packing list with shipment ID, FNSKUs and sent quantities. Format and content are controlled in the filter area via Packing list settings.Step 4: Open the case with Amazon
In the modal click Copy (puts the message in the clipboard) and then Open case — you land in Seller Central in the seller support help flow. A step-by-step guide for this is in the next section.Step 5: Store the case number
Enter Amazon’s case number in the modal field Case number and click Save case number. It then appears in the overview table.Step 6: Add a note
Use Notes to record when Amazon last responded or what deadline is set.Opening the case with Amazon — how it works
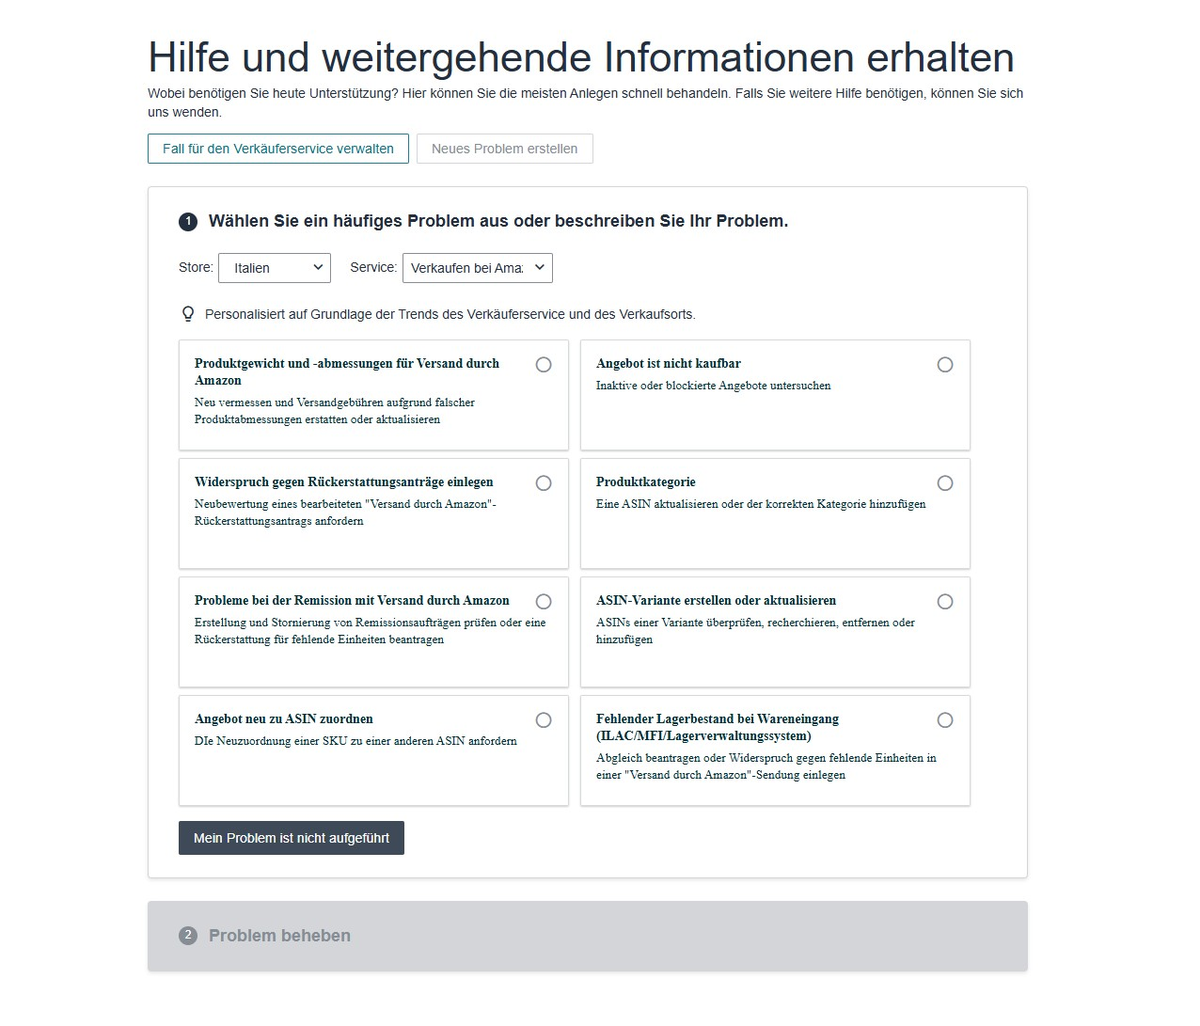
After clicking Open case you land in Amazon seller support (“Get help and additional information”). There are two paths:Standard path: “My issue isn’t listed”
- Check the store at the top — it must be set to the marketplace of the shipment (e.g. Germany, Italy). If the wrong store is set, the case will fail.
-
You’ll see a selection of common issues. None of them matches missing inbound units directly — so click My issue isn’t listed at the bottom.
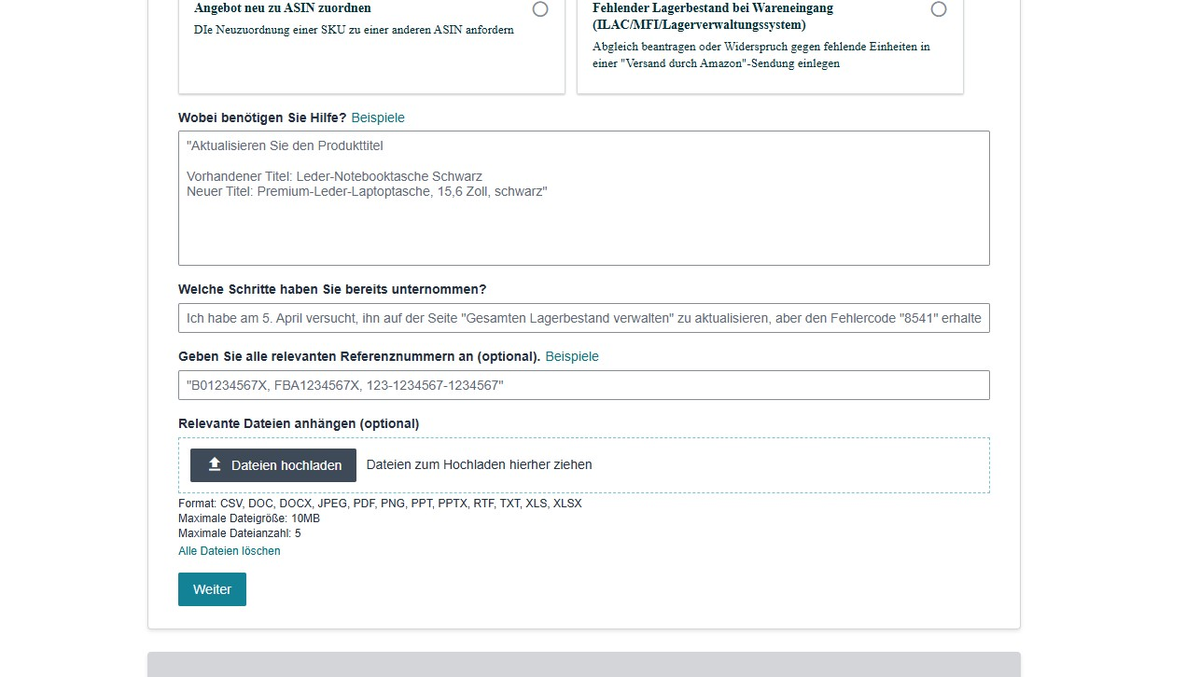
- A free-text form opens. Under What do you need help with? paste your prepared message from the case modal (copy it to the clipboard first using the Copy button). Under Attach relevant files upload the generated packing list — that significantly increases your success rate.
-
Click Continue and finish the case.
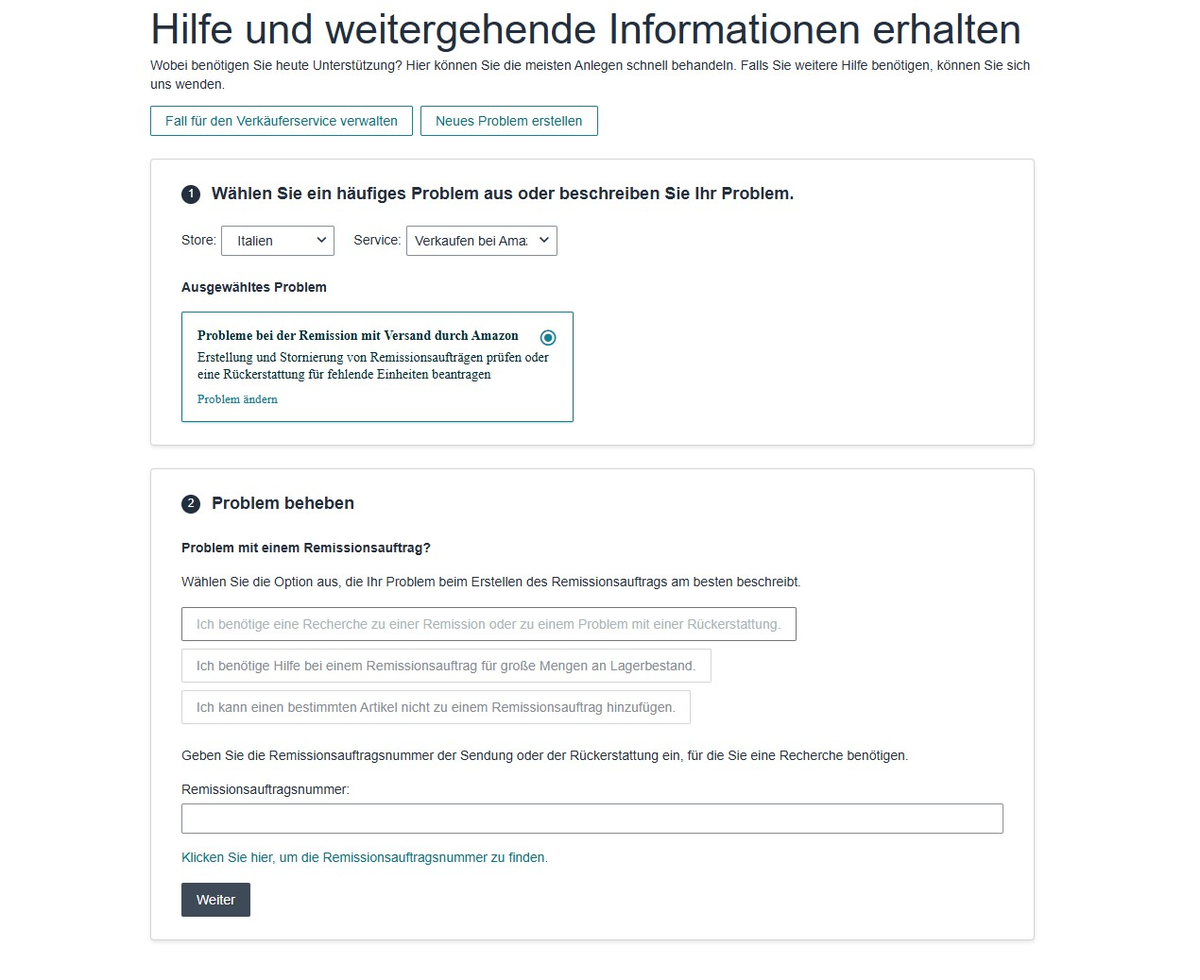
Alternative path: “Issues with FBA reimbursement”
Also works — but asks more from you.- Choose Issues with FBA reimbursement in the issue selection.
- In the next step choose I need an investigation into a reimbursement or a refund issue.
-
Enter the reimbursement order number (Amazon provides a helper via link if you don’t know it).
Important notes
- Amazon keeps looking for missing units for 30 days after warehouse check-in. Only after that does opening the case make sense.
- Status
RECEIVINGmeans: Amazon is still checking in — the discrepancy may not be final yet. - Reimbursed units appear in the Reimbursements overview (see related articles).