> ## Documentation Index
> Fetch the complete documentation index at: https://docs.arbitrageone.de/llms.txt
> Use this file to discover all available pages before exploring further.
# Collegare un Prep Center "PrepBusiness" ad ArbitrageOne
> Collega PrepBusiness come Prep Center ad ArbitrageOne.
**Passo 1: Accedere al portale Prep Center**
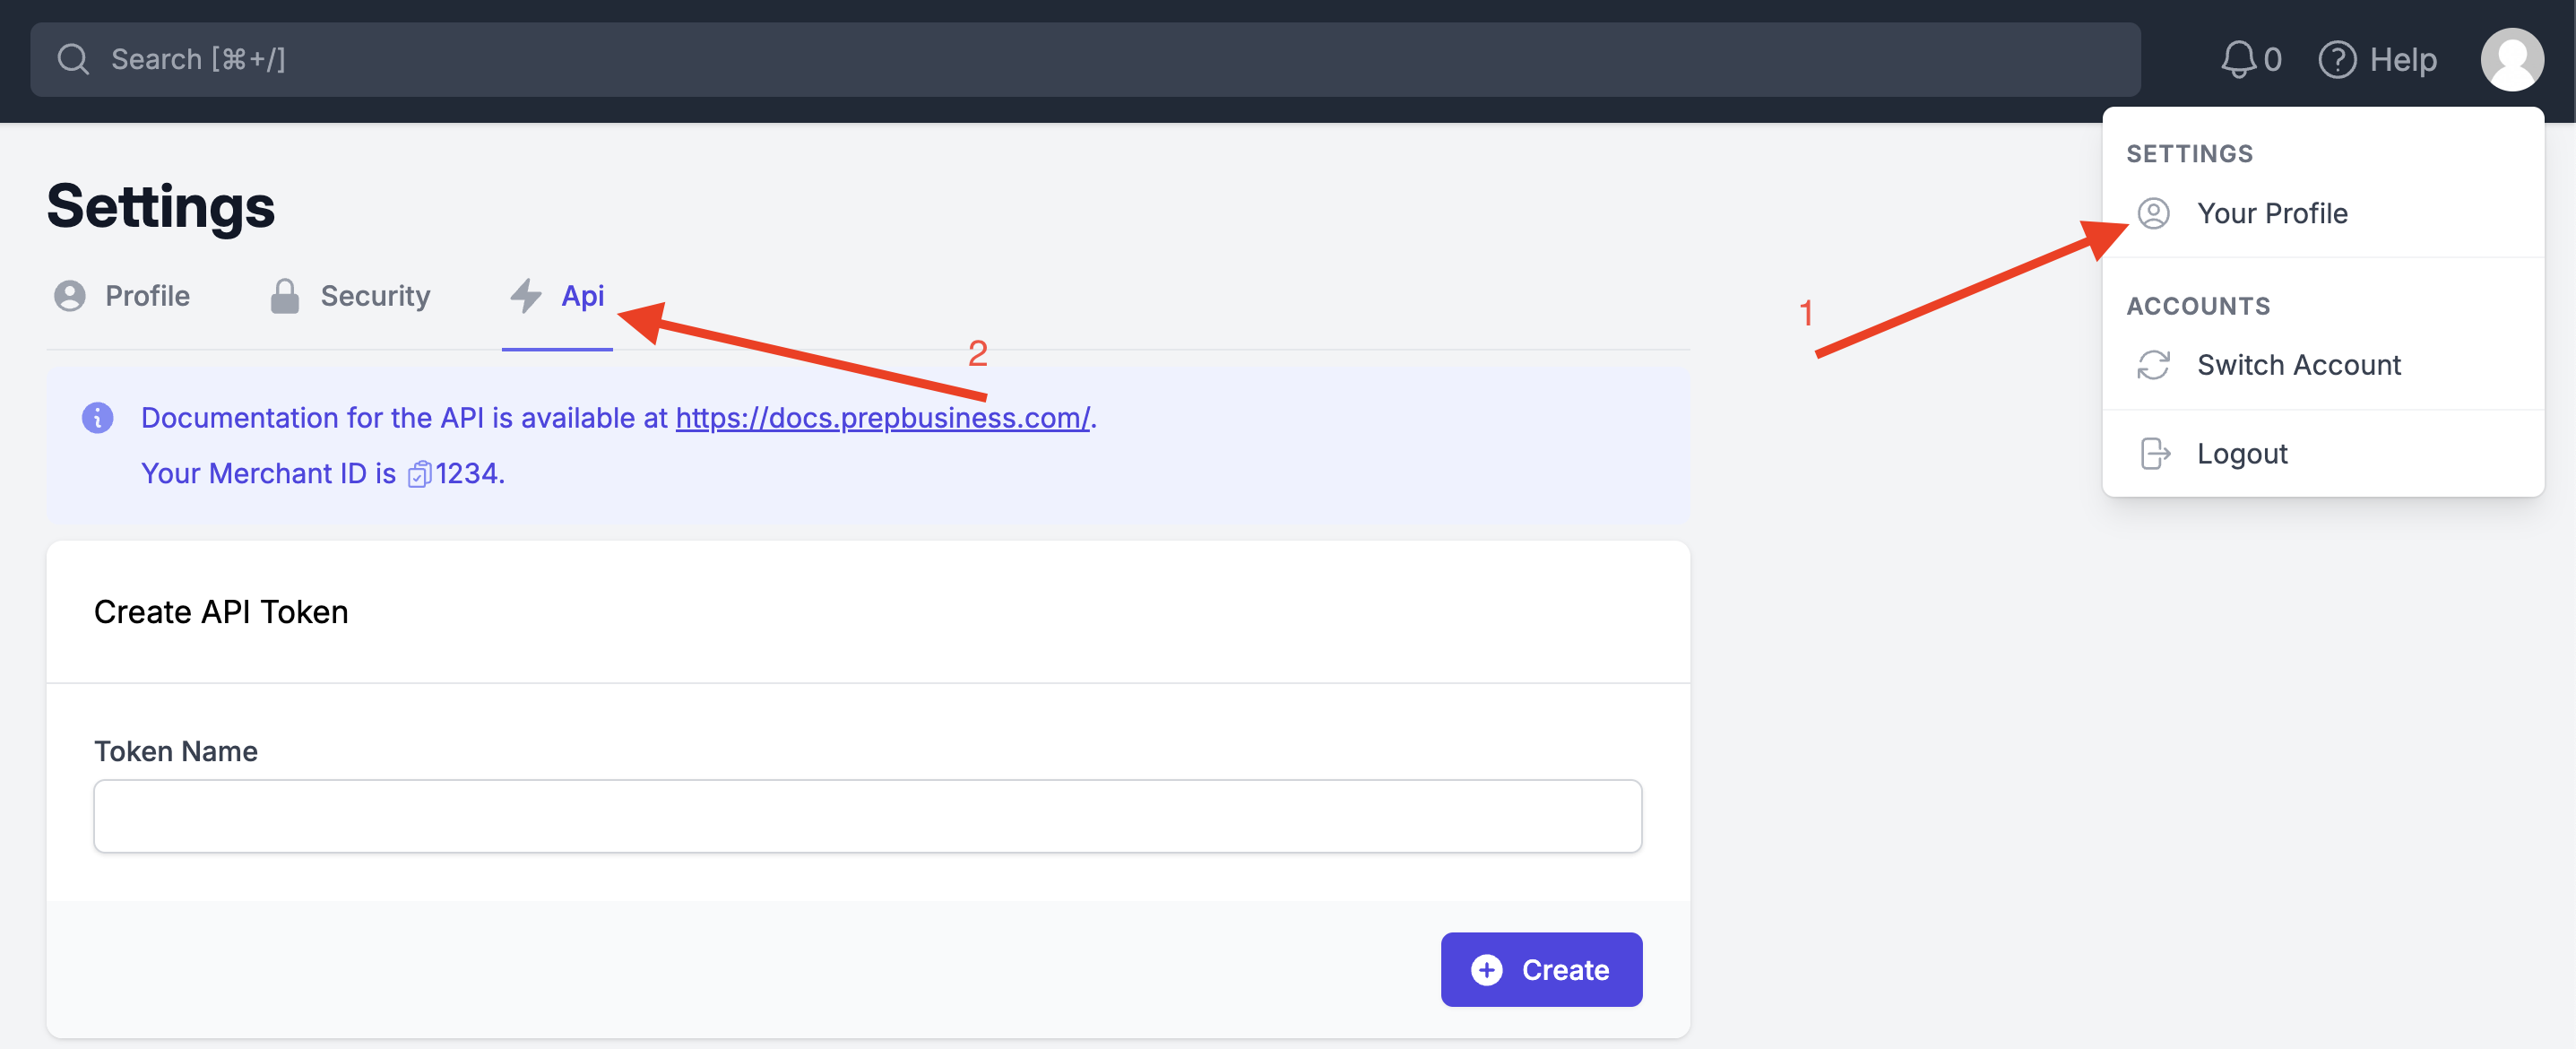
Accedi al **portale Prep Center** e clicca sulla tua foto profilo in alto a destra. Seleziona **"Your Profile"** e poi la scheda **"Api"**.
 **Passo 2: Creare un token API**
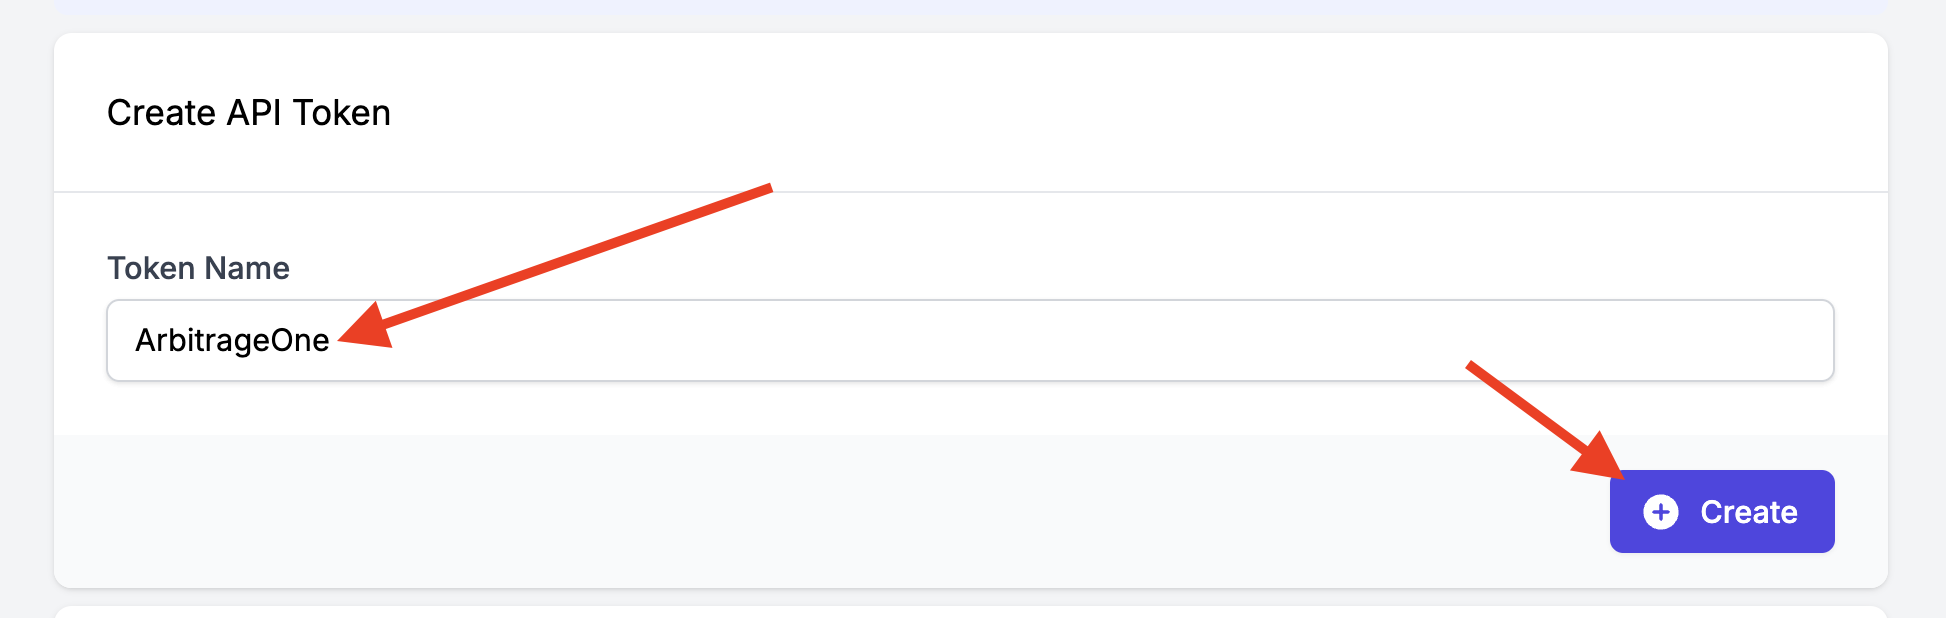
Sotto **"Create API Token"** inserisci un **Token Name** (es. *ArbitrageOne*) e clicca su **"Create"**.
**Passo 2: Creare un token API**
Sotto **"Create API Token"** inserisci un **Token Name** (es. *ArbitrageOne*) e clicca su **"Create"**.
 **Passo 3: Copiare e incollare la chiave API**
→ Apri direttamente nell'app: [app.arbitrageone.de/apiconnections](https://app.arbitrageone.de/apiconnections)
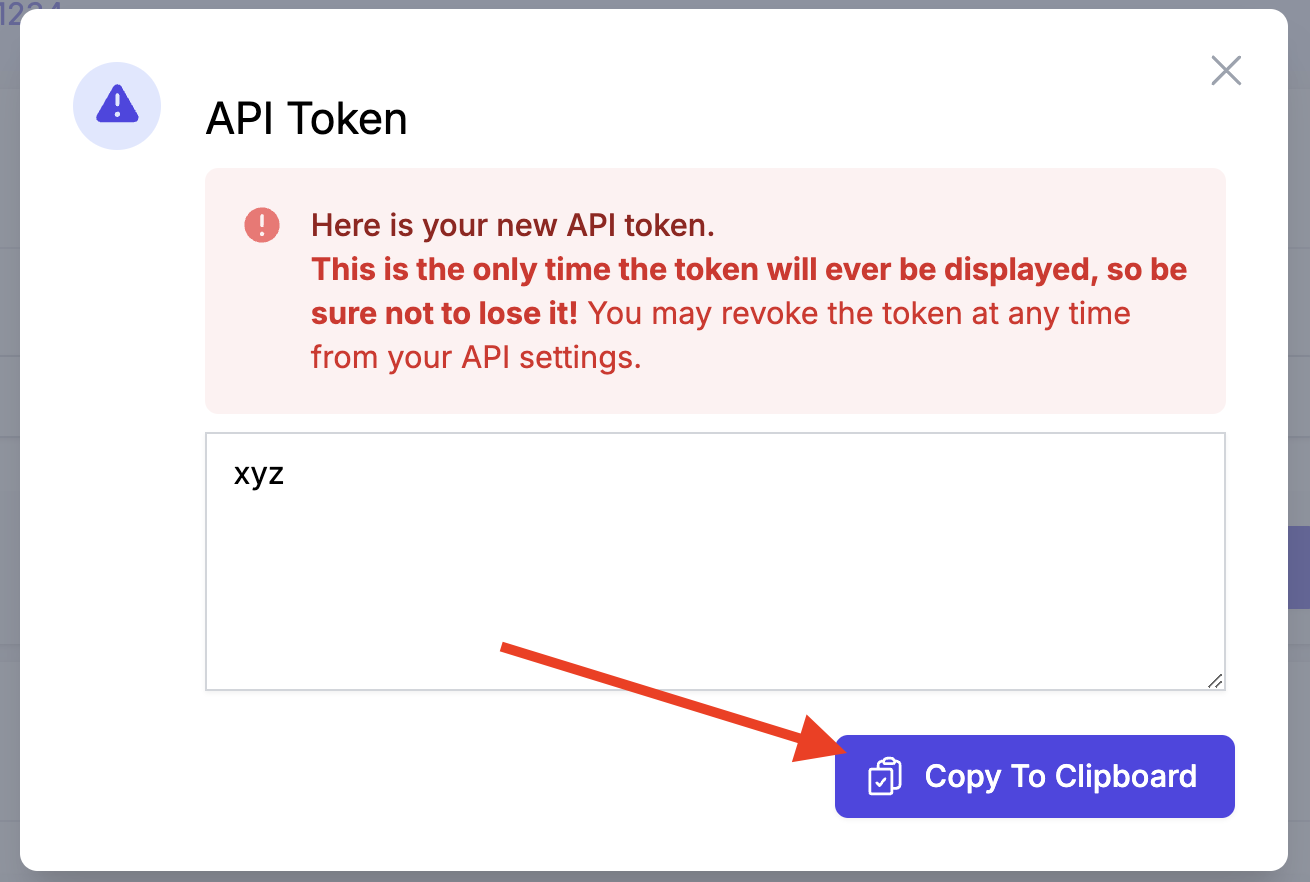
Appare una finestra pop-up. Clicca su **"Copy To Clipboard"**, poi incolla la chiave API in **ArbitrageOne** sotto **"API Token"**.
**Passo 3: Copiare e incollare la chiave API**
→ Apri direttamente nell'app: [app.arbitrageone.de/apiconnections](https://app.arbitrageone.de/apiconnections)
Appare una finestra pop-up. Clicca su **"Copy To Clipboard"**, poi incolla la chiave API in **ArbitrageOne** sotto **"API Token"**.
 **Passo 4: Copiare e incollare il tuo Merchant ID**
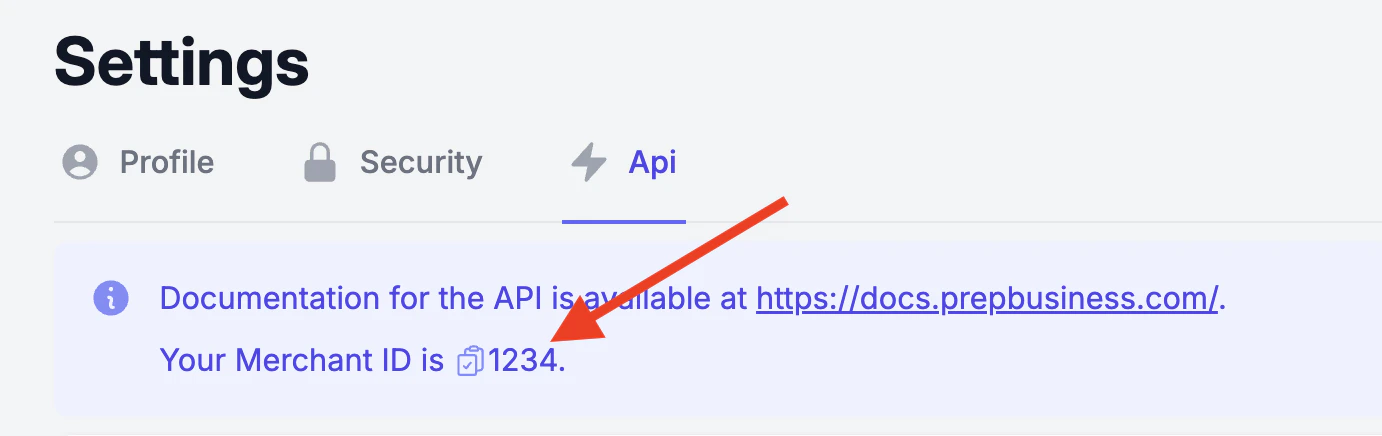
Torna al **portale Prep Center** e chiudi il pop-up. Poi copia il tuo **Merchant ID** — lo trovi in alto nella casella info blu (clicca sull'icona di copia accanto al numero) — e incollalo in **ArbitrageOne**.
**Passo 4: Copiare e incollare il tuo Merchant ID**
Torna al **portale Prep Center** e chiudi il pop-up. Poi copia il tuo **Merchant ID** — lo trovi in alto nella casella info blu (clicca sull'icona di copia accanto al numero) — e incollalo in **ArbitrageOne**.
 **Passo 5: Aggiungere un indirizzo di spedizione**
→ Apri direttamente nell'app: [app.arbitrageone.de/shippingaddresses](https://app.arbitrageone.de/shippingaddresses)
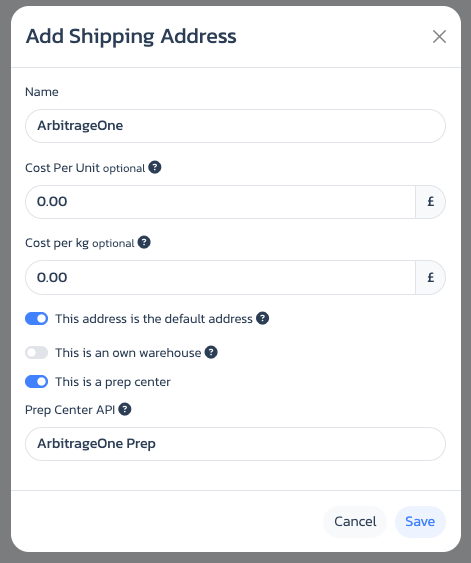
Dopo aver aggiunto con successo il Prep Center API, aggiungi o modifica un **indirizzo di spedizione** in **ArbitrageOne** sotto *Impostazioni*. Attiva il toggle **"È un Prep Center"** e seleziona l'entrata corretta sotto **"Prep Center API"**.
**Passo 5: Aggiungere un indirizzo di spedizione**
→ Apri direttamente nell'app: [app.arbitrageone.de/shippingaddresses](https://app.arbitrageone.de/shippingaddresses)
Dopo aver aggiunto con successo il Prep Center API, aggiungi o modifica un **indirizzo di spedizione** in **ArbitrageOne** sotto *Impostazioni*. Attiva il toggle **"È un Prep Center"** e seleziona l'entrata corretta sotto **"Prep Center API"**.